V2 Chapter 14
LDuring this period (2005-04-27 to 2005-07-12) I was able to build a prototype streaming audio client and server, tested a radio control client, broke and fixed that antenna rotor and then broke it again.
Additional Content
69. Move to integrated Audio (2005 -07-09 to 2005-07-12)
2005-07-12 Results of first audio client test:
- Rick Bishop was able to hear the test tone from the client yesterday. He reports that he let it run for 300 seconds
- David Ames from England was able to hear the test tone yesterday
- Dr. Such was unable to hear the tone today. I have checked the setup and it should be hearable. Paul corrected a setup parameter and now can hear the tone.
I still need a couple of other reports, either positive or negative, before I go ahead.
2005-07-11First Audio client Test. Down load the test client and configure it like the pix below. When you hit 'start' you should hear the output of my SETI receiver set to the frequency of my Weak Signal Source. Please eMail Mewith the results. Thanks.......

2005-07-10 With Viktor's help I managed to figure out that I already had a ActiveX component on my development pallet with the class name of TKnob. This caused Viktor's knob install to fail because its class name is also TKnob. With that solved I can go ahead with the development of the client. Later I realized that I needed to edit my DCLUSR.DPK file to remove the original TKnob class. This worked and I was able to install Viktor's knob. I still don't know how to have two components with the same class name but I have a question out on the Borland Delphi list server so it should come back within the hour.
I never did hear anything useful from the Borland list server but I managed to figure it out. Here is the recipe:
Install an OCX
- Component | Import ActiveX Control. Find the control in the list of registered controls or hit Add. Browse to the file of the control. It is usually an OCX file but it can be anything. You can also change its extension to OCX for consistency.
- When you select the component the class name will appear in the box. You can change the class name right there. Change the name when you already have a component with that class name in your DCLUSR.DPK file. The DCLUSR file contains all the components on the pallet.
- Hit Install. This will rebuild your DCLUSR.DPK and the new control will appear in the pallet page that you selected.
Remove an OCX
- Close any project you have open
- File | Open and browse to your DCLUSR.DPK file. Mine is in 'Program Files\Borland\Delphi7\Lib'. Select it and a Package dialog will appear.
- Select the Type library. DCR file for the component and hit Remove. Another dialog will appear where you have to select the DCR file again (I have no idea why). Do the same for the .PAS version of the type library.
- Hit Compile.
- Close the Package builder from the 'x' on top right. Save the new DCLUSR.DPK file and your in business.
With this technique I was able to create a system with both Viktor's knob and Global Majic knob ready to use. If I ever have to recompile a unit with a component that I have changed the class name of I expect the compile will fail until I remember what the name should be.
| Ps If you wonder why I put this type of detail in the notebook its because that way I will have a record of the fix for the next time it happens. |
The azimuth portion of the antenna rotor failed sometime over the 4th of July weekend. I was in the mountains and had left it running for people to use and I guess they did. Not there fault that it froze up, their should be no way that moving the antenna could damage the rotor. So no I have to pull it down again and perform a YARR on it.
I'm also attempting to figure out a new version of the Remote SETI client/server software that will make use of the receiver. I am stuck on a simple problem. I am attempting to put a knob in the client that can be used to set the receiver frequency. I have a great knob from Viktor Toth (take a look at it yourself) but I can't seem to install it in Delphi 7. Viktor is helping me with the problem at the present time. When that is up and running I'll go back to working on the audio streaming portion of the system.
Stay tuned...
68. Move to integrated Audio (2005 -06-04 to 2005-07-09)
2005-06-18 It looks like WiNRADiO would rather not allow me to include their radio user interface in the remote client so I will have to re-invent the wheel in this case. It's to bad because the WiNRADiO interface is very nice and works - building one from scratch is difficult and will never come out as well as that one.
I have the receiver user interface in a rough state and need to work out the syntax of the commands sent between the client and the server but its workable. Sending the audio will be another challenge.
2005-06-05 Well I bought the Lake Of Soft components and spent the day playing with SHOUTcast from nullsoft. SHOUTcast is a good system but I'm afraid it won't work for Remote SETI. The problem is that although I can configure an audio server on my local computer and stream the receiver audio to the nullsoft audio servers it takes over a minute for the audio to show up on the client. So if you were using this system and you changed the frequency of the receiver you wouldn't hear anything different for a very long time. Not good when you are browsing around for E.T.
I could build server that would send the audio stream directly to the Master Client and stream to nullsoft at the same time. That way the MC would be up to date but any other client would be out of date by a minute at least. Hummm!!!
I think I had better put my energy into a single MC hearing the audio. I am pretty sure I can do that with the Lake Of Soft components. I'll work toward that.
2005-06-05 I am looking into using some audio components from Lake Of Soft. They have what seems to be what I need to stream MP3 audio and if so that would take care of the 'I need to own it" part of the problem. I'm also looking into something called SHOUTcast by nullsoft that may take care of the bandwidth / multiple client problems. As they say "Stay Tuned".
2005-06-04 The ability to stream audio to a Remote SETI Client has been proven. This was done using a client/server set from WiNRADiO. Although it does work it has a couple of problems:
- I don't have control of it - That's no small consideration. If (when) it brakes if it Ain't mine I can't fix it
- Only one client at a time can listen to the audio. While only one client (the Master Client) can control and antenna and receiver their is no reason why more than one client can't listen to the receiver
- Bandwidth. I am on the wrong end of a asymmetrical cable link to push audio content. While the download speed of my cables speed is very fast ( www.speakeasy.net = 3,070 kbps download speed, 355 kbps upload speed) as you can see the upload speed is not what would be needed for a bunch of clients.
- Another problem is that the WiNRADiO user interface for the client is very nice and I would have trouble coming up with something nearly as well done on my own. I would like to keep on using their interface but its difficult to figure out how to do that.
So these are the next challenges on the road to a fully integrated Remote SETI Client/Server
67. Add Receiver control to Remote SETI Client / Server (2005 -05-26 to 2005-06-04)
2005-05-27 To run the client with receiver audio do the following steps:
-
Download the [Sorry - audio client not available. WiNRADiO didn't want me to distribute the client software ]. This Zip file is 2.3 Meg and contains two other files. Run the cs1000-201.exe file and select 'client'. This places an icon in your Start | Control Panel of WiNRADiO. Open this program and select the Add button on the bottom. Make the changes necessary as shown below then say OK and close it.

- Install the other file from within the original Zip. This is wr1xxx-360.exe. This is the radio user interface. After installation it will require you to restart your computer.
- After restart open the Remote SETI Client and gain control of the antenna (you must be Master Client). Move the antenna to any location you wish by right clicking inside the Sky Map search area.
- Start the radio 'Start |Programs | WiNRADiO 1000-1500 series' and if all went well you will have control of the SETI Net receiver.
- Run the receiver in LSB and tune it to 1420,390,440. This is the frequency of my Weak Signal Source (WSS) beacon I have running in my shop. You should hear a loud note right near that frequency.
- If you feel adventurers download and start the Spectrum Analyzer (or run your own). You should be able to see the WSS.
2005-05-26 I have hooked the remote client/server from WiNRADiO into the system and am running test with it now (first was Ray Shank, Argus Station EM26bd from Tulsa OK.) The installation is *very* crude but we will see how it works...
DAMN THING WORKS. Ray is switching the receiver around and listening to the audio from Tulsa!!!
66. Add Sky Map to Remote SETI Client / Server (2005 -05-17 to 2005-05-26)
2005-05-18 - The process of isolating the Sky Map from the Antenna Parameters unit turned up a problem in the SETI Clock (duh). This has been fixed and the new clock available for download. As I work on the Client/Server the last release is running on the Remote Server computer here at SETI.Net. I will try to keep one version available 7 X 24.
2005-05-17 - The next step in the development will be the addition of the Sky Map. First task is to attach the Sky Map unit to the existing client. To do this the sky map had to be isolated from the AntennaParameters unit. This was done using properties and field items.
65. Remote SETI Client / Server (2005 -04-26 to 2005-05-17)
The creation of a Remote SETI Client/ Server is key to the next set in an integrated Argus station. To date a working client / server set using XML-RPC has been created and distributed.
2005-05-15 - Fixed the errors found during test #3 of the client/server.
Several people were able to log in and run the antenna through its paces. Paul Shuch, New Jersey, was the first to control the antenna Az and El remotely. Hamdi Mani from Tunisia was the second. Many others ran the system in the demo mode and it seemed to work fine.
-
After a server-restart the clients can log in but when they attempt to start the Az/El refresh it blows their clients up. At first I thought it was a problem with the operating system because the problems all occurred on XP machines, but Paul was able to run fine with both Win98 and XP. The problem seems to be in the client. Found and Fixed.
-
Paul pointed out that I have the stop-to-stop rings (their called annulars) on both the Az and El gauges setup wrong. Found and Fixed.
-
found that the Antenna server user interface doesn't come up when the remote server is running on Win 2003 server. I have no idea why but I have to move the server to that machine so I can continue development on this machine (Zeke). Still working on this one.
-
I am going to add a one line chat to the client. That would help greatly and reduce the load on the SETI League list servers. Added
-
I will move the LED that signals when you are the Master Client to a place that can be viewed from any page. I will also show who is the Master Client. by name. on each of the clients so there will be less confusion. Added
Now I can move to the next level The next client major release will have the Sky Map hooked in so that you can see what point in the sky the antenna is point at. I will also allow the antenna to track a specific point. After that streaming audio in MP3 format and saving of the raw WAV files to the archives.
2005-05-10 - Test #2 of the client/server. Several clients came and went during the test. One error was reported. That occurred when I shut down the server and then restarted. This caused the clients to through an exception. The problem is repeatable so I should be able to find it. After that bug is fixed I will move toward a two way client. Where the client not only can see the position of the antenna but can move the antenna. That should be interesting...
2005-04-28 - I am now working through the process of developing a client and a server for Remote SETI. The client will run on your desktop, t he server on my home machine. After struggling with a bunch of options I have settled on XML-RPC as the transport mechanism. I have built several prototype clients and servers and now understand how its done. Its now time to build the first non-prototype Client/Server combination.
First order of business is to develop the protocol. I have opened a new page for Remote SETI that will show the details as they develop. Watch this space for news.
64. YARR (2005 -04-27 to 2005-04-25)
Antenna up and running again. I managed to clean out the cylinder using an automotive type cylinder cleaner hooked to my drill motor. This helped a lot. I also managed to balance the antenna better by moving the weights out further and removing one 10 pounder. This seems to make the elevation motor happy for the time being. Now I can get back to the development of the Remote SETI client/server software.
2005-04-26 If you have been following this blog you will know that the last thing in chapter 13 was a failed Remote SETI test that ended in a failed antenna rotor as well. This resulted in the start of Yet Another Rotor Rebuild (YARR). This is not a new phenomena, the rotor has been rebuilt several times already, but sometime soon I will no longer be able to raise the gin pole, winch the antenna down from the rotor and then the rotor down from the pole. Its just to difficult. At any rate that time has not arrived yet so I have the rotor down from the pole an am now working on it one more time.
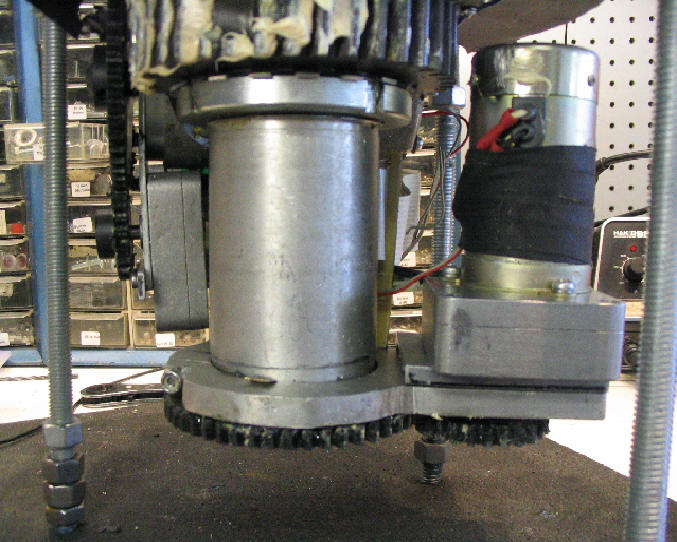 If you take a look at this picture of the insides of the rotor you can see that the elevation motor has slipped down the center shaft. This caused the motor to jamb its gears and the whole system to fail. But what caused the motor to slip down?
First was that the yoke was not tightened on the shaft with enough force. I replaced the screw (left side bottom) with a stainless #8 hex head and a nylon insert nut. I opened the slot in the yoke (not visible) to allow it to compress more on the shaft and then I really put the hammer down on the screw and nut. That should hold it in place. Next I removed the bottom gear and extracted the screw and piston assembly to see how it was.
This is where it starts to get ugly so the next few photos are considered 'for adults only' 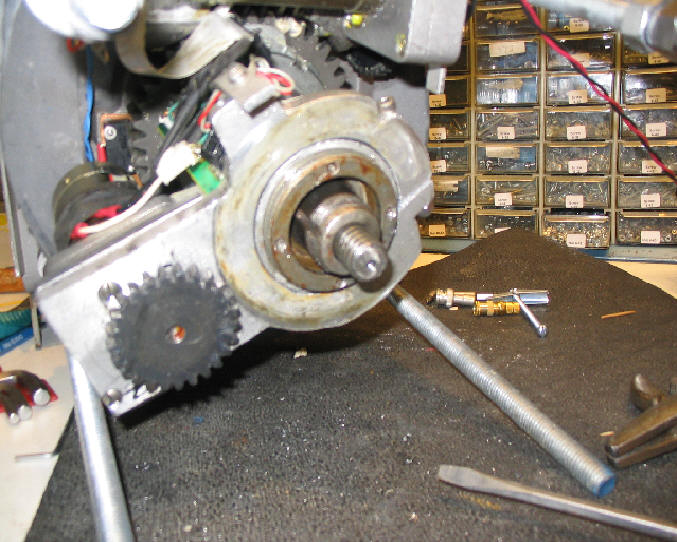 This is the bottom of the shaft. Next one shows a bit of rust on the bottom tapered roller bearings.
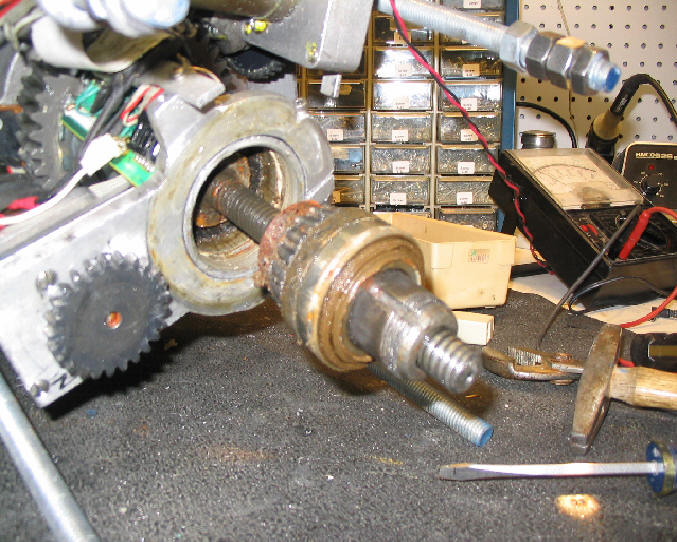 This shows considerable rust on both the top and the bottom bearing. They both have to be replaced.
 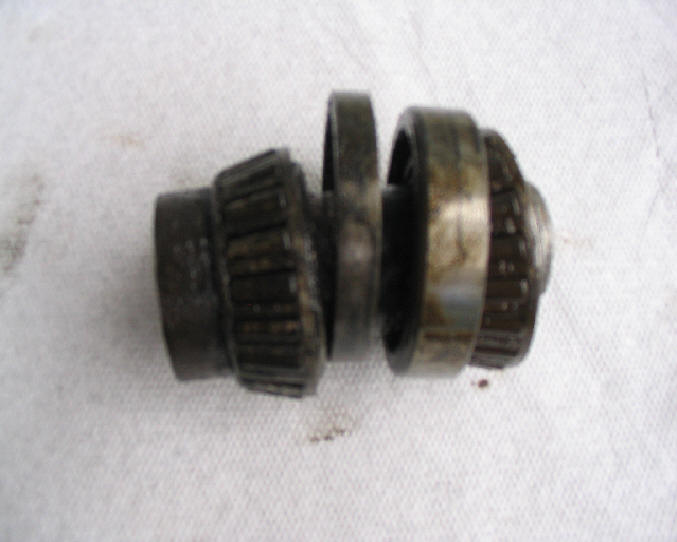 The whole assembly is shown so I can remember the assembly order.
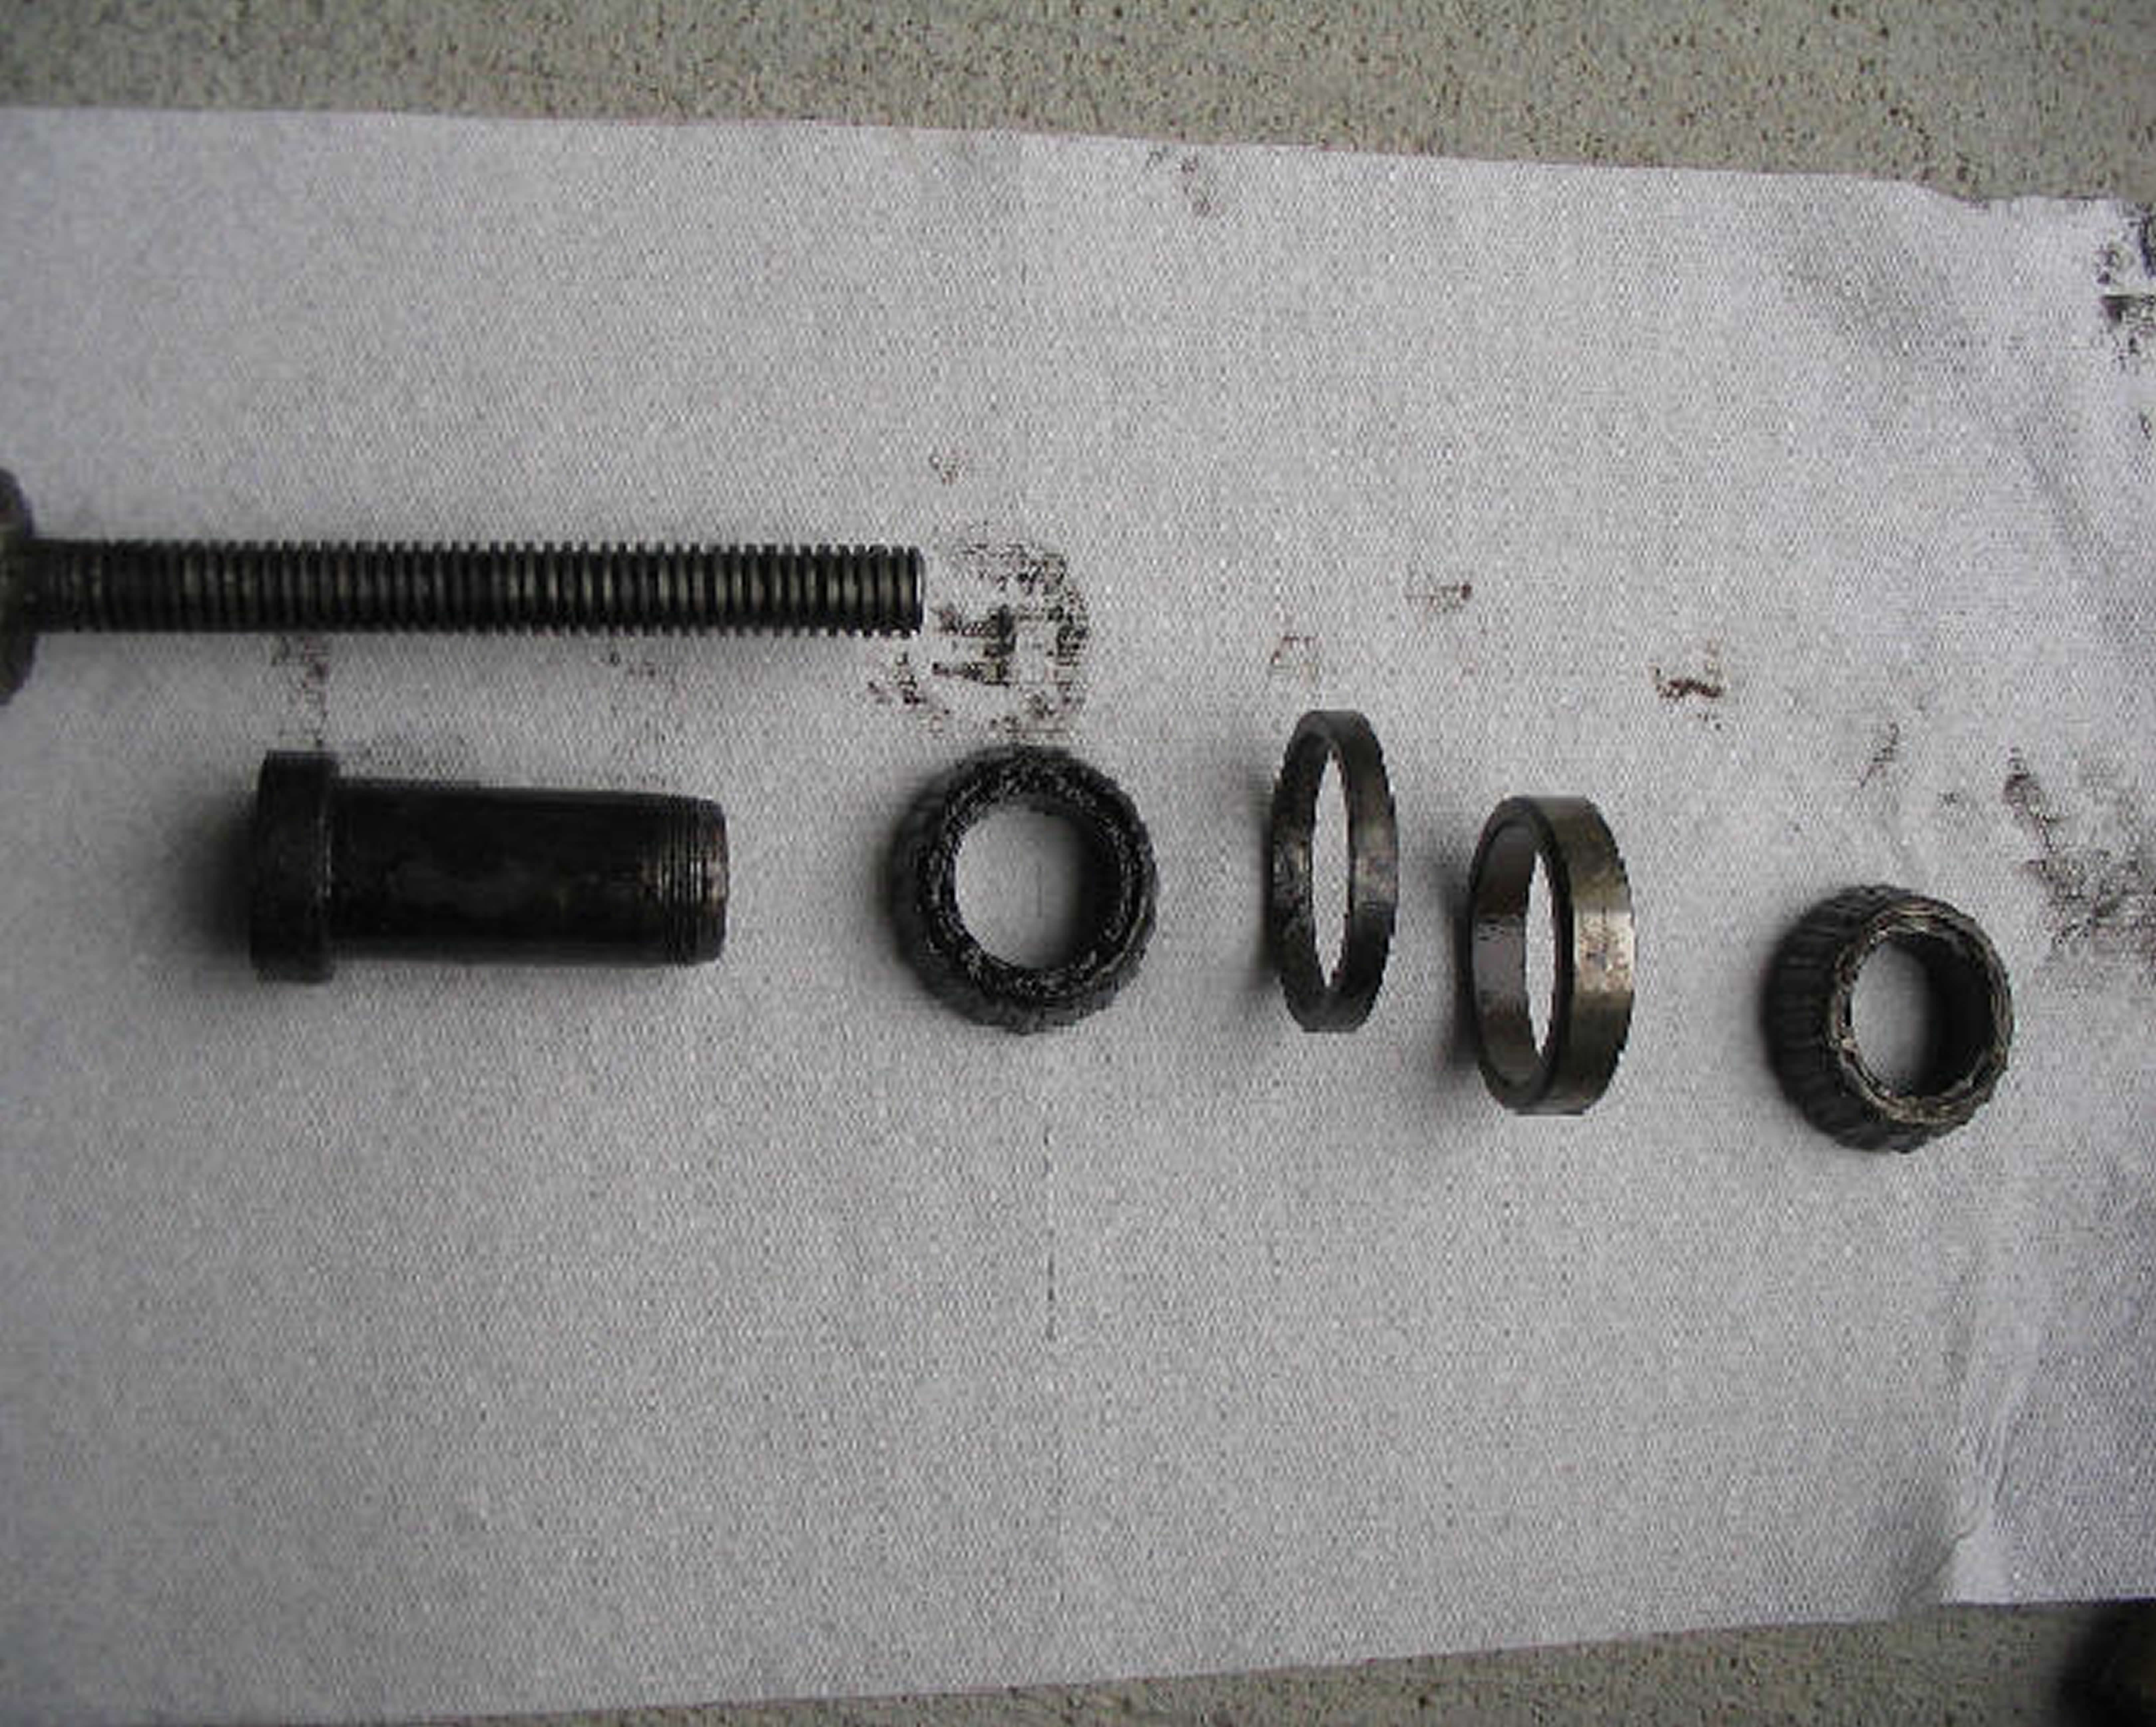
I traveled all around San Diego trying to find a replacement set but could not. Then I did what I should have at the beginning and Googled the number on the bearing. I immediately came up with:
RockAuto Who run a very professional web page business. I ordered two of the bearings:
| BCA 32006 at $15.43 each with second day air for $35.92 Total 66.78 | This was on Sunday. On Tuesday I checked Fed Ex's web site and it said they were delivered at 11:46 AM. Since it was then a few minutes after noon I went to my front door and there they were.
That's how a business should be run |
I went down to the local mechanic and had him squash some grease into the bearings with a tool that he uses. Now I have what it takes to complete the YARR.
Everything finally together and ready to put back on the pole. Its a good thing I took those assembly pictures because half way through the assembly sequence I realized that I had one of the bearings in wrong by looking at the pix.
